
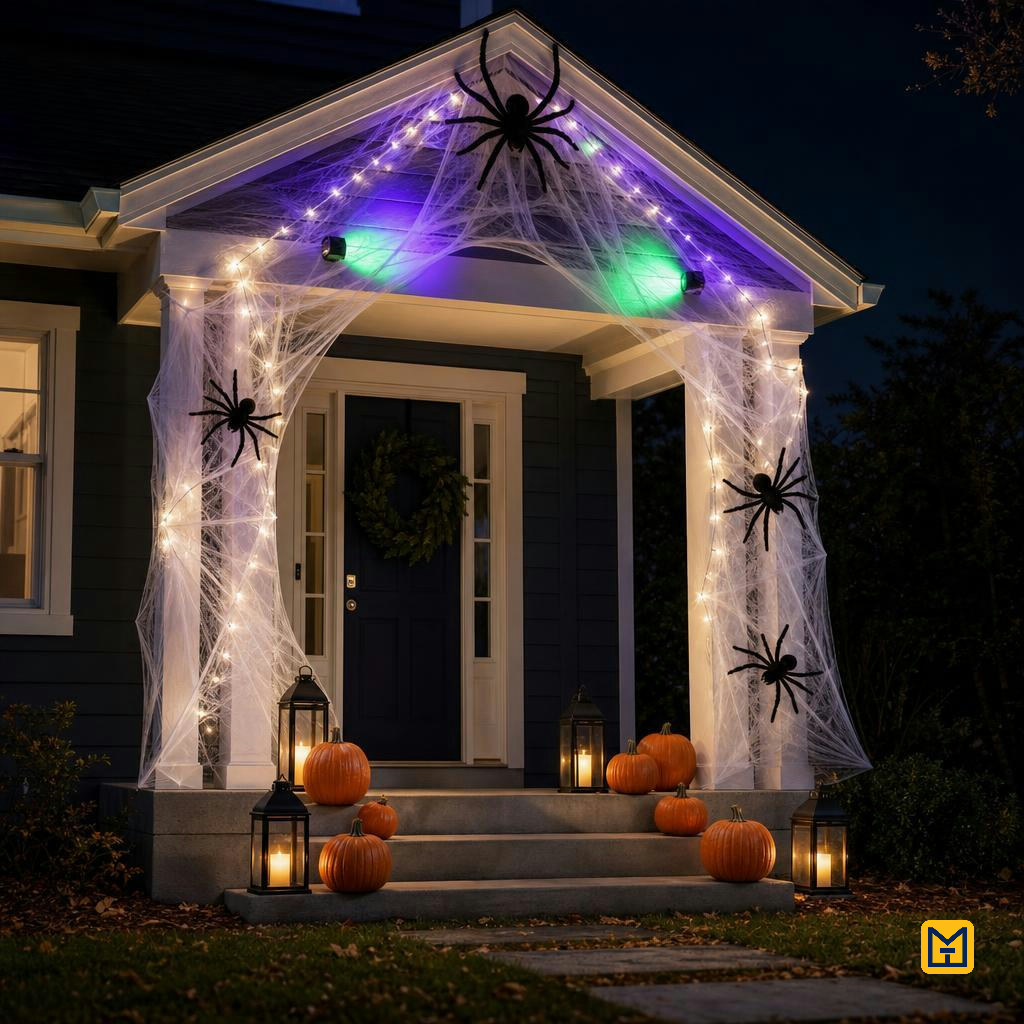
Giant Spider & Cobweb Porch Entrance
by Makeit_official
Transform a covered porch into a glowing Halloween scene with draped stretch cobweb, giant spiders clustered at the gable peak, battery fairy lights woven through the web, and a pumpkin-and-lantern display on the steps. Built for anyone who wants a dramatic no-damage seasonal display that comes down cleanly after Halloween.
Mounting Hardware
Heavy-duty removable adhesive hooks (outdoor rated, mixed sizes)
1 multi-pack, spaced 40-50 cm apart along each web run (for hanging web, lights and spiders without screws)
13
Clip-style gutter/eave hooks
6-8 (grip over the fascia edge with no adhesive needed)
8
Outdoor-rated adhesive strips
1 pack (for lighter web sections and post wraps)
5
Zip ties (small, black)
1 pack of 50 (to lash spider legs into the web)
4
Cobweb & Spiders
Stretch cobweb bags (200 g each)
5 bags (covers gable, ceiling and both posts)
20
Extra-large spider prop (about 1 m leg span)
1 (centrepiece at the gable peak)
45
Large spider props (about 50-70 cm leg span)
3 (descending down the sides and posts)
55
Lighting
Battery-powered LED fairy light strings with timer (10 m+, warm white or colour-change)
3 strings
38
Spare batteries (size to match the light strings)
1 extra set per string
8
Battery-powered colour spotlights (purple and green)
2 (for the coloured gable wash)
20
Step Display
Pumpkins (real or weatherproof faux, mixed sizes)
5
23
Battery LED lanterns or flameless candle lanterns
3
25
Loose stretch cobweb (small bundle)
1 bag (to drape over step edges)
4
Step 1 of 8
Plan the layout and test-mount hooks
MATERIALS
TOOLS
Step ladder
Tape measure
MARK AND TEST HOOK POSITIONS
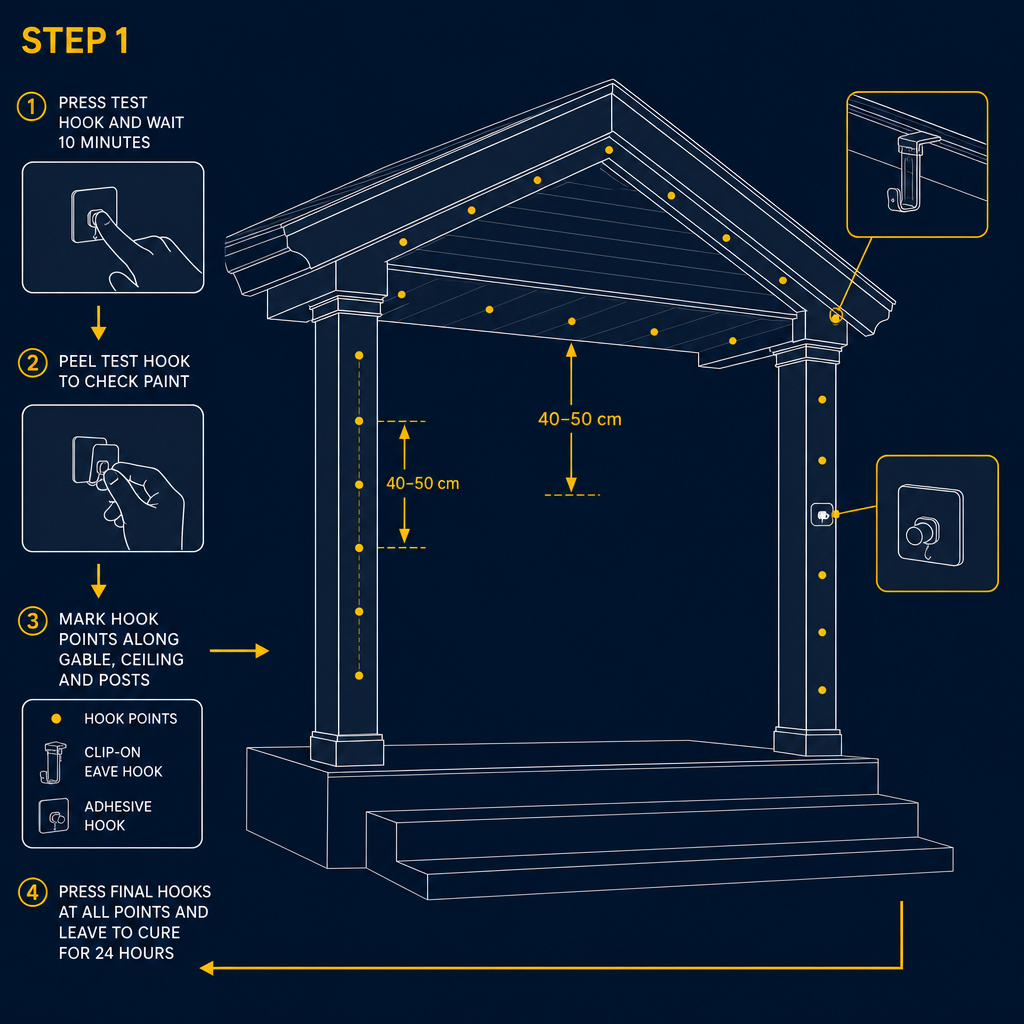
- ✓Test one hook on hidden spot first
- ✓Mark hook points at even 40-50 cm spacing
- ✓Press hooks firmly, then let cure fully
Instructions
• Press a single test hook onto an inconspicuous painted spot, leave it 1 hour, then peel it off to confirm the paint does not lift • Mark hook positions along the gable peak, down both posts and across the porch ceiling, spacing hooks roughly 40-50 cm apart along each planned web run • Use clip-style eave hooks anywhere there is a fascia edge to grip, saving adhesive hooks for flat surfaces • Press each adhesive hook firmly for the full contact time stated on the pack, then leave every hook unloaded for its full cure time (check the pack — typically several hours) before continuing • Site the battery pack location for each light string now, choosing a spot that stays reachable once the web goes on
Time & Waiting
Active work
1-2 hours
People
1 person
Wait before next step
several hours hook cure
Swipe or use ← → keys
Want to follow this guide step by step or log your own build?
Open in the Makeit App